Data entry - How to enter specimen data
Table of contents
- Data entry - How to enter specimen data
- How to create a new Preparation in a new Collection Object
- How to enter data
- How to add determinations
- How to add Collecting event data
- How to enter Collectors
- How to enter Locality data
- How to enter Description, Number of Duplicates, Associated Material and additional Remarks to the Collection Object record
- How to enter Cultivated Information
- How to enter information about the population size, abundance, area of occupancy, etc
- How to enter local names or usage information
- How to attach documents to the Collection Object record
- How to create a new Preparation for an existing Collection Object
- Special situations
- How to physically link specimens
- Cultivated specimens
- Cultivated specimen created from RBGE living collection with data in Iris
- Cultivated specimen (not from RBGE) with previous collecting event information on the label
- Cultivated specimen (not from RBGE) with limited or no previous collecting event information on label
- Cultivated specimen created from RBGE living collection with no data in Iris
- Level of data entry
In Specify, specimens considered to be part of the same collecting event and assigned the same collector number are entered as individual Preparations with a Collection Object. Use Specify for Herbarium sheets/packets (duplicates and multi-sheet specimens), Spirit material and Carpological specimens. Do not use Specify for Silica-dried material at present.
When entering a specimen, consider whether there may already be data imported. Data may have been imported if electronic data were received with the specimens, or there may be a separate related preparation already in the database. If you think that this might be the case, use a query to check. If you need to create a new Collection Object for the Preparation follow the instructions immediately below. If a Collection Object already exists and you want to add a Preparation, then follow the instructions at the bottom of this page.
How to create a new Preparation in a new Collection Object
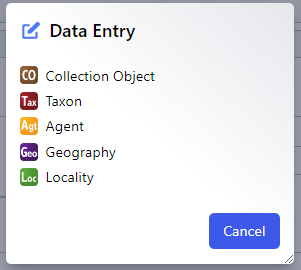
To add a new record click on the Data Entry button on the main menu bar:

Select Collection Object from the pop up:
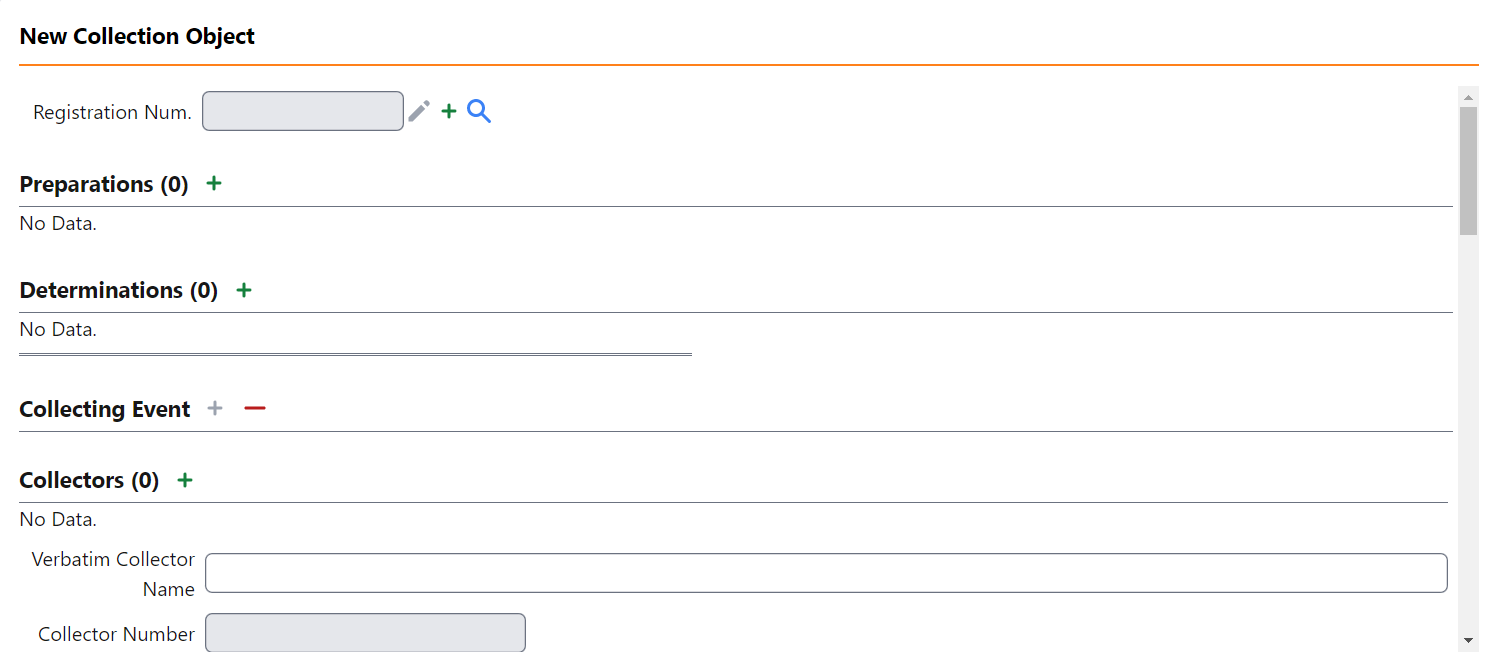
This opens the Collection Object entry screen
At any point, to save the record click Save in the bottom right of the screen. To add another blank record click Add Another, or to add another starting with a copy of the current one, click Clone.

Tip: If you are in a subform as a pop-up window, such as Preparations, then you will need to save / close the window first to return to the Collection Object form to click Save.

The Collection Object form will open as a single form with several sections. Click on + to the right of the section heading to add a new item, or click the > to expand an existing item.
How to enter data
Registration Num: Enter the Registration Number if this specimen has been registered as incoming material.
Tip: In Specify, this table was called Accessions, but due to possible confusion for RBGE, it has been renamed Registrations. However, the icon for this table is still ACC.
How to add a Preparation
To add a preparation to a record click on + next to Preparations
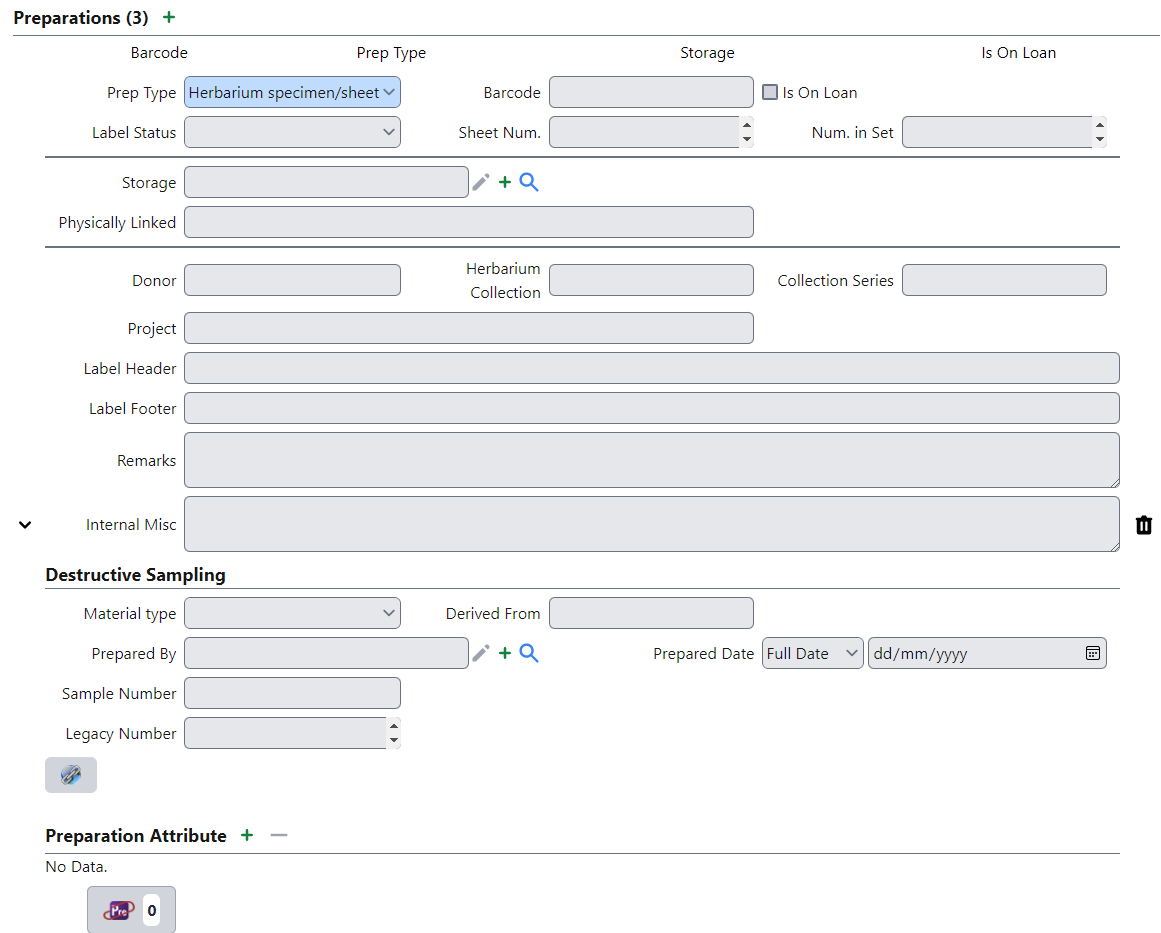
This expands the Preparation entry form as part of the Collection Object form. For each additional preparation needed click Add. The fields are explained below:
- Prep Type - select the kind of material (e.g. Herbarium sheet, Carpological).
-
Barcode - scan the barcode of the specimen or enter the destructive sample item number. Both should be unique.
- Tip: There is a weblink button to the right of the Barcode field which will link to the specimen record on the Herbarium catalogue.
- Is On Loan - this is a read-only field. It will be automatically ticked if the preparation is on loan
- Label status – Enter the status of the label information for this record (e.g. Complete, Partial, Minimal, Unknown)
- Sheet Number - enter the number of the sheet in the set if marked on specimen
-
Number in Set - enter the number of sheets in the set if marked on specimen
-
Storage – enter the storage location of the specimen (e.g. Main Herbarium, Long Store, Spirit Room, Silica Room, Carpological Collection). For physically linked specimens (where there is more than one specimen permanently mounted on a sheet), the lowest barcode should be created as a storage location and used to store all the specimens on the sheet. See the Physically Linked section for more information.
- Donor - enter the name of the Institute/collection that directly donated the specimen to RBGE. (e.g. Glasgow, Herb of John Ball). More guidance will be provided on the use of this field.
- Herbarium Collection – enter the name of the Herbarium Collection (e.g. Herb. Greville, Herb. Wight, Herb. Wallich, Herb. Drege) where the herbarium collection differs from the donor and collector. More guidance will be provided on the use of this field.
- Tip: Some of the Herbarium Collections will have been donated from a third party, such as Kew, Glasgow, etc. In these cases the Donor will be Kew and the Herbarium Collection should be entered here.
- Collection Series - only enter if a collection series is known.
- Project - if applicable select the project from the dropdown list. At present it is only possible to select a single project so this field should be used with caution. Please ask if unsure.
- Label Header - enter the label header here, eg Flora of Nepal.
- Label Footer - enter the label footer here.
- Remarks - enter any remarks specific to the Preparation, not the Collection Object, here.
- Internal Misc – use this field for any internal curatorial information which is not to be shared.
How to add phenology information to the specimen
This subform holds additional information about an individual specimen.

Please be aware that this subform is not working properly at present and should not be used until the bug is fixed.
The fields in this section are:
- Phenology – enter the phenological state of the specimen. More guidance will be provided for this in future.
- Treatment – enter the treatment applied to the specimen during collection, if known.
- Packet Content – enter the packet content.
- Sex – enter the sex of the plant, if known.
How to enter Destructive Sampling information
This section should only be completed for preparations created during destructive sampling.
- Material type - enter the type of material sample (e.g. Flower sample, Leaf sample, Pollen sample).
- Derived from - this is for preparations made for Destructive Sampling ONLY. Enter the barcode of the specimen from which the sample was taken.
- Prepared By – enter the person who prepared the sample. – Tip: type in the last name and, if the person is already in the Agents table, their name should come up as one of the options in a list.
- Prepared Date – enter the date that the destructive sample was created.
- Sample Number – do not enter data here. This has been used for the destructive sample collector number migrated from BG-BASE.
- Legacy Number – this is a read-only field for the BG-BASE specimen number.
How to attach documents to a Preparation
Click on the icon to open up the Preparation Attachments form and add attachments to an individual preparation.
Currently, this is not used.
How to add more preparations
If there are multiple preparations to add to the Collection Object click + again to add an additional record. Once they are added, preparations will be displayed above the Preparation section of the form.
How to remove a preparation
Only delete records created in error at present. To remove a Preparation from a record click the dustbin icon next to the Preparation.

More guidance will be provided on removing preparations, but please use with caution.
How to add determinations
Any name that has been applied to a specimen is treated as a Determination. This includes the Label Name, the Filing Name, Typification names as well as any additional determinations.

To add a determination click on Add next to Determinations. A new determination should be added for each name being applied to the specimen.
Tip: The most recently added Determination will be automatically ticked as the Filed As name. Therefore it is recommended to enter the determinations in the following order: 1) Label name, 2) Det. slips in chronological order with the most recent more likely to be where the specimen is filed.
The fields are explained below:
- Name Usage – enter the usage of the name being associated with the specimen (e.g. Label name, Curatorial annotation, Data Capture name, Det., Fide, Typification). Guidance for each option is given below:
- Label name: The label name is the original name on the label. In some cases it may not be clear whether the name on the label has been added as a later det. If it is not clear, it is recommended to treat it as the label name by default. If there appears to be no label name, then create a record with Unknown as the taxon. The label name is not considered to be a det. and should not have any determiner or date information in it.
- Curatorial annotation: A curatorial annotation refers to any name written on the specimen by curation staff that is not considered to be a det. This can include names written in pencil to indicate the name under which the specimen is filed.
- Data Capture Name: A data capture name is used primarily for minimal data capture where the name entered is the name on the folder where the specimen is filed.
- Det.: A det. name is a name resulting from a taxonomic determination and will be linked to a det slip on the specimen or potentially an electronic det received online or by e-mail.
- Fide: A fide name is where the specimen has been cited in a revision or other taxonomic work.
- Typification: The names for which the specimen is a type are treated as determinations in Specify. Typification determinations should include the type status.
- Legacy filing name: The legacy filing name should not be used for future name usage. It was used during the migration to hold the BG-BASE Filing Name data.
Please note that we are no longer creating a separate ‘Filing Name’ entry. The ‘Filed as’ tick box will now serve this purpose. See the Filed as entry below for more information.
- Taxon – enter the name of the taxon. Start typing the taxon name and a dropdown of all of the matching names will appear. This is refined as you keep typing.
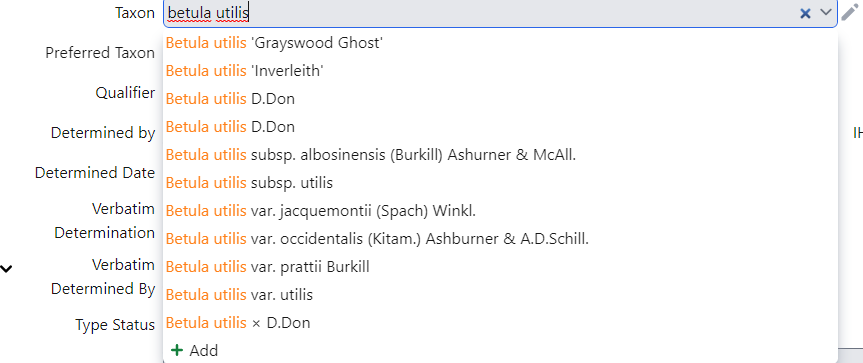
Tip: If the name you are looking for is not in the list then check by clicking on the magnifying glass to search more thoroughly. If you still don’t see the record then you will need to add a new Taxon (see Adding a New Taxon Name)
Note, you cannot enter the author name as part of the search. Enter the Genus, species name and any intraspecific epithets only.
-
Filed as – this is automatically ticked as each new determination record is added. Once all determinations have been entered, check that the determination which holds the name under which the specimen is filed is ticked here.
Tip: it may be that several determinations have the same taxon name which is where the specimen is filed. If this is the case, as a general rule the most recent determination should have the Filed as box ticked.
-
Prefered Taxon - if the name entered into Taxon Name is a Synonym, the Prefered Taxon will be displayed here. This is a read only field. Tip: You can copy the Preferred Taxon name even though the field is grayed out, and paste it into a new Filing Name determination.
- Determination Qualifier – enter the qualifier if present in the determination (e.g. cf., aff. ?, forsan)
- Determination Addendum – enter the taxon addendum if present (e.g. sensu latu (s.l.), sensu strictu (s.s.), auct. non Brit. etc.)
- Determiners – enter the name(s) of the person(s) who made the determination if known. This is not required for Label name, Data Capture name or Typification determinations.
- Remarks - enter any remarks specific to the determiner of this Preparation. To add a determiner click the green + and search for the agent in the query combo box. To add additional determiners click the green +

- IH Code – enter the Index Herbarium Code of the determiner if known.
- Determined Date - enter the date the determination was made if known. Use the dropdown to the left to select whether it is a Full Date, Mon/Year or Year. This is not required for Label name, Data Capture name or Typification determinations.
- Det. Barcode - enter the barcode of the specimen the determination is from. For collection objects which have more than one preparation, this will ensure that it is known which individual specimen was seen and identified. This should be entered for all Dets, Curatorial Annotations and Typification determinations. It is not required for Label name determinations.
- Verbatim Determination - this is a read only field for data migrated from BG-BASE
- Verbatim Determined By – if there are multiple determiners, enter their names here. This also contains the name of the determiner from BG-BASE
- Type Status – for a Typification determination, enter the kind of type (e.g. Holotype, Isotype, Syntype, etc.)
- Det. Note - enter any miscellaneous information associated with the determination (e.g. unusually large leaves for this species).
- Det. Citation – this holds the citation information relating to the determination as a temporary measure until the Taxon Citation table is in place.
- Family No. – do not enter data here. This is a calcuated field for the RBGE family filing number.
-
Genus No. – do not enter data here. This is a calculated field for the RBGE genus filing number.
- Free Text Name - this is a read only field for data migrated from BG-BASE
When all the determinations have been added, check that the correct name has been ticked as the Filed As name.
Note: Be aware that the Filed As name is applied to all Preparations within the Collection Object. This should not be an issue for most of the spirit collection, silica-dried collection and much of the carpological collection. If there are other Herbarium Sheet preparations within the Collection Object, they should be checked to ensure that they are physically filed under the Filed As name being selected.
To help decide which name should be used as the Filed As name, the following guidance can be used:
When creating a new Collection Object for a Preparation
- If there is only a single name associated with the Collection Object then use this by default
- If there is more than one name associated with the Collection Object then use the most recent det. if it is not a synonym by default
- If the most recent det. is a synonym, then check if there are any other specimens currently filed under this name or the accepted name. If there are, then a decision will need to be made about the curation of these specimens.
When creating a new Preparation under an existing Collection Object
- If the most recent det. agrees with the existing filing name then this name should be used by default
- If the most recent det. does not agree with the existing filing name then a decision will need to be made whether the other specimens can be recurated.
When laying away, the Filed As name should be used.
Note: The number of Determinations is indicated in brackets next to the Determinations heading.
How to remove a Determination
To remove a Determination from a record click the bin icon  .
.
How to add Collecting event data
This section contains information about the Collectors and the Collecting Event (where and when the specimens were collected).
How to enter Collectors
In Specify, all collectors are held in the Agents table, along with expeditions, organisations and institutes.
Collectors, collector groups and collected with - Where the specimen has been collected under the number series of a primary collector, then a Group Agent record should not be used and each individual should be entered as a separate collector in the Collection Object record. The first collector entered is treated as the primary collector.
Tip: the use of the term ‘collected with’ is a good indicator of this kind of number series.
Expeditions - Expeditions are treated as Group Agent records in the Agents table. Expeditions are defined by a having a unique collection number series that doesn’t belong to a particular individual. They may have an expedition name or the name may be a list of the surnames of the collectors. All collectors that took part in an expedition should be added as participants to a Group Agent record. Account for day-to-day discrepancies by added abscences of particular individuals in the remarks field of the Group Agent record. For more information on this, please see the guidance on adding new agents.
To add a Collector to the Collection Object record click on the + button next to the Collectors header
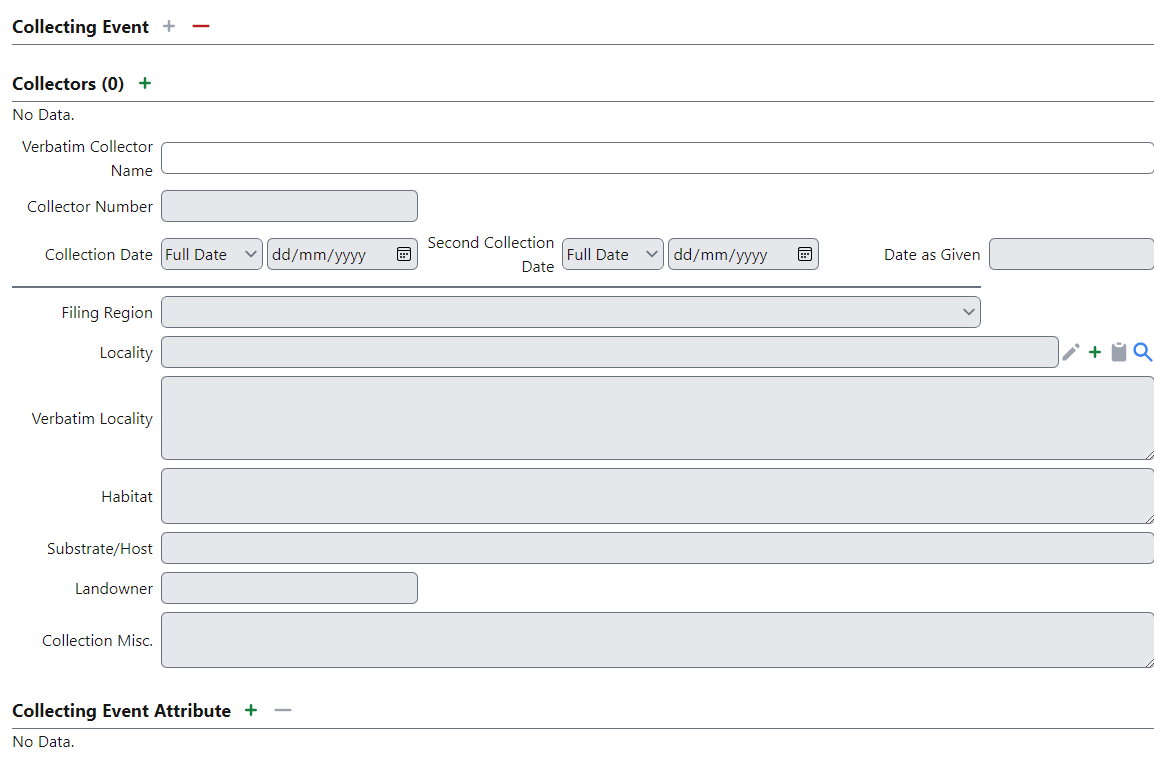
This expands the Collector subform
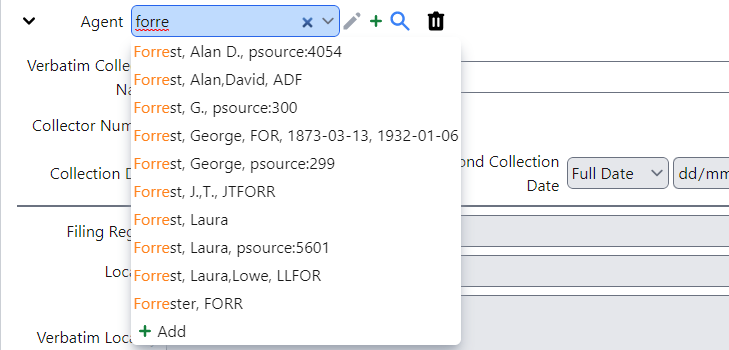
- Agent: enter the name of the collector or expedition. Start typing the last name of the collector or the name of the expedition and a dropdown of all of the matching names will appear. This is refined as you keep typing. Use wildcards to help search, e.g. %Ratter to find individual records and expedition records that include the name Ratter in the name of the record.
If you are not sure whether collectors should be entered as an expedition or as separate individuals, then the following options may help:
- Search for the expedition name first
- Search for the primary collector and check the drop-down list for records which look like groups collecting as an expedition
- Click on the edit symbol to look more closely at any agent record (but remember that any changes made to the record will affect all records in the database attached to that agent!)
- Until we deduplicate the Agent names, please use the version that has the most complete name. This may have a collector code in the summary, eg Forrest, George; FOR
If the name you are looking for is not in the list, then check by clicking on the magnifying glass to search more thoroughly. If you still don’t see the record then you will need to add a new Agent (see Adding a New Agent)
Tip: if you infer the collector from the handwriting or other information, provide this information in the Collection Object remarks.
- Verbatim Collector Name - this is a read-only field for the free text collector name in BG-BASE.
- Collector Number - this is the number given to the collection by the collector. This includes any prefixes or suffixes. Do not enter any spaces between any prefixes and suffixes.
- Collection Date - enter the date the collection was made in the following format DD/MM/YYYY. Use the dropdown to the left to select whether it is a Full Date, Mon/Year or Year.
- Second Collection Date – enter a second date if a range of dates are given on the specimen e.g. 1891-92. Use the dropdown to the left to select whether it is a Full Date, Mon/Year or Year
- Date as Given – enter the Collection date here if it cannot be expressed in the Collection Date and Second Collection Date fields e.g. Summer 1893
-
Filing Region – enter the region under which the specimen is filed. If the specimen is filed under a physically linked specimen mounted from a different region, then select the region under which it would be filed if separate. If the specimen is Cultivated, then select the ‘Cultivated’ option from the drop-down list, unless it is filed under the geographical filing region (there are a small number of families where cultivated specimens are being filed under the wild collected region). Tip: Unless it is known that the specimen is filed different, select the standard geographical filing region.
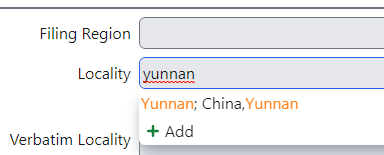
- Locality - All records should have a value in here. This field links to the Locality table and is not equivalent to the free text locality in BG-BASE. It currently includes Country, Sub-Country 1, Sub-Country 2 and Sub-Country 3. Search for the lowest known value and select it from the dropdown. Any locality information below the value entered here should be entered in the Verbatim Locality field below. As a minimum, enter the country here.
-
Verbatim Locality – enter any locality information not included in the Locality field above. Tip: this field equates to the free text locality in BG-BASE. When entering data you will need to make a decision about division of locality and habitat in some cases.
- Landowner – enter the name of the owner of the land where the collection was made if known. Use the following format: Surname, First name (Cubey Robert) or Surname Initials (Cubey, R.W.) – where the first name is unknown.
- Habitat - enter the description of the Habitat in which the specimen was found.
- Substrate/Host – enter the substrate or host if the specimen was found growing on another species or substrate e.g. a lichen growing on an Oak branch
- Collection Misc. - enter miscellaneous information about the collecting event here.
How to enter Locality data
The Collecting Event Attribute part of the form is used to record information relating to Altitude, Latitude, Longitude and Geo-Referencing. To add information to the Collecting Event Attribute record click on the + button next to the Collecting Event Attribute header.
This expands the Collecting Event Attribute part of the form
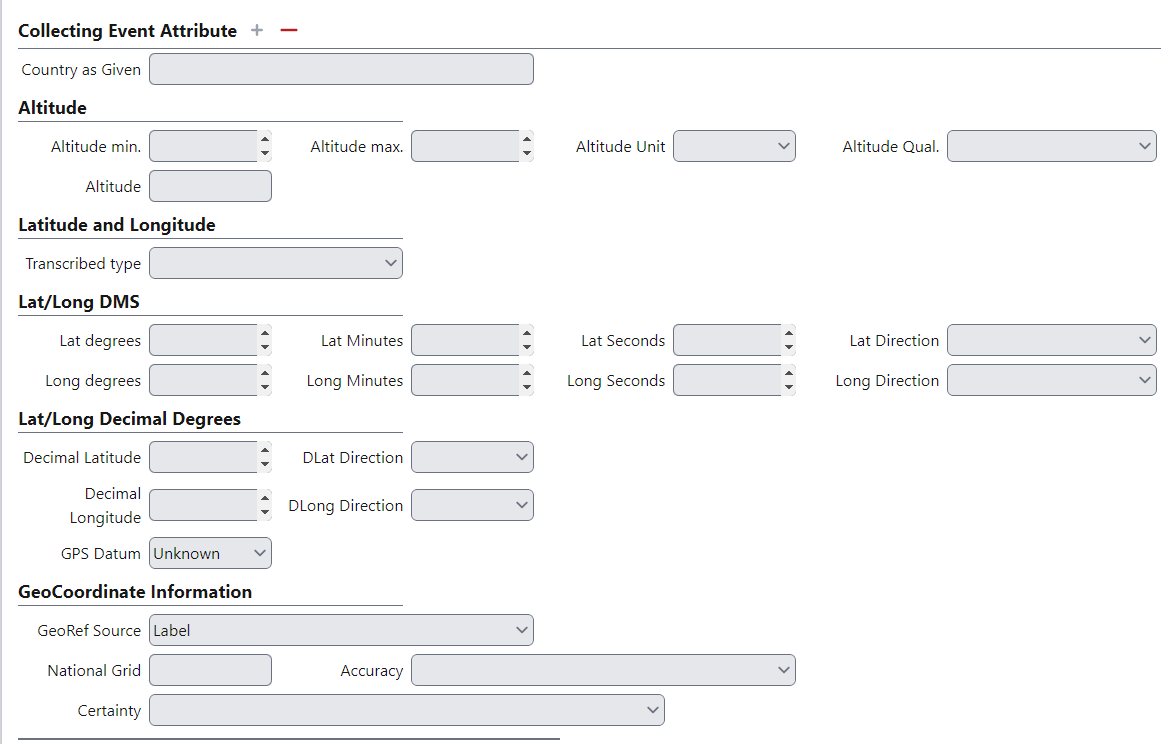
- Country as Given - enter the Country as it was given by the collector as it appears on the label (e.g. Burma, German East Africa).
- Altitude Minimum - enter the altitude. If a range is given enter the lower value in this field. Enter the unit and any qualifiers in separate fields.
- Altitude Maximum – enter the second value if an altitude range is given.
- Altitude Unit – enter the measurement unit of the altitude (e.g. m, ft, unknown).
- Altitude Qualifier – enter the qualifier for the altitude (e.g. above/greater than, below/less than, ca)
- Altitude – this is a temporary read-only field for a direct export from BG-BASE. This is a temporary field and is a read only field. Once the data from BG-BASE have been cleaned to fit the structure of Specify it will be removed.
- Altitude in Meters - this is a read-only field for the calculated field from BG-BASE when the altitude on the label was not in meters.
- Latitude and Longitude Enter the values into the relevant fields. If the latitude and longitude are in decimel minutes (eg 39° 26.23’) then use the DMS option rather than the Decimel Degrees option.
- Latitude degrees/minutes/seconds
- Degrees - enter the degrees of the Latitude
- Minutes - enter the minutes of the Latitude
- Seconds - enter the seconds of the Latitude
- Direction - enter the direction of the Latitude
- Decimal Latitude - enter the Latitude if it is given as Decimal Degrees
- Direction - enter the direction of the Decimal Latitude
-
Latitude as Decimal - this is the calculated field from BG-BASE. This field is read only
- Longitude degrees/minutes/seconds
- Degrees - enter the degrees of the Longitude
- Minutes - enter the minutes of the Longitude
- Seconds - enter the seconds of the Longitude
- Direction - enter the direction of the Longitude
- Decimal Longitude - enter the Longitude if it is given as Decimal Degrees
- Direction - enter the direction of the Decimal Longitude
- Longitude as Decimal - this is the calculated field from BG-BASE. This field is read only
- Latitude degrees/minutes/seconds
- GPS Datum - enter the datum used, if given (e.g. WGS84). If not explicitly stated then leave as Unknown.
- GeoRef Source – enter the source of the georeference (e.g. label, gazetteer, map).
- National grid - enter the national grid, if given, for where the specimen was collected
- Accuracy – enter the accuracy of the geocoordinate information if known (e.g. <5km from coordinates, 5-20km from corrdinates, > 20km from coodrindates, GPS accuracy, no information).
- Certainty – enter the certainty of the geocoordinate information (e.g. Certain, etc.).
How to enter Description, Number of Duplicates, Associated Material and additional Remarks to the Collection Object record
The Description and Number of Duplicates form part of the Collection Object information. These are positioned on the form after the Determinations and Collecting Event information
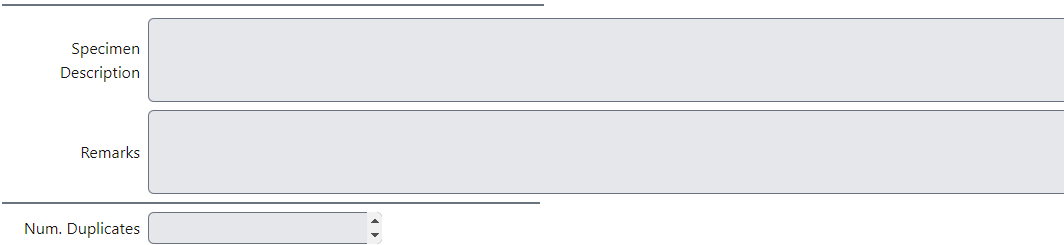
- Description - enter the description of the specimen as given on the label.
- Number of Duplicates - enter the number of duplicates that were made when the specimen was collected if known.
- Associated Material - enter any information about associated material that are not being created as Preparations within the Collection Object record here. This should include DNA, silic-dried material, photographs, etc.
- Remarks - (this field is currently being added to the form) - enter any additional information about the Collection Object, including Associated Material. When adding Associated material:
- If the associated material is a duplicate, spirit or a destructive sample held at RBGE then a separate preparation should be created if not already done
- If the associated material is silica gel then it should be entered into the silica-dried material database - a note can be made in Remarks.
- If the associated material is a DNA sample, then it should be entered into EDNA database - a note can be made in Remarks.
- If the associated material is a photograph or illustration, then it should be entered as a note in Remarks, prefixed with Associated_mat if possible.
- If the associated material is a duplicate herbarium specimen in another institute, this should be entered as a note in Remarks, prefixed with Associated_mat if possible.
How to enter Cultivated Information
In Specify, all cultivated specimen collection data are treated at the same level as wild-collected collection data using the same fields. The specimens are then linked to show the relationship.
For RBGE cultivated specimens, it is a priority to ensure that the Accession Number and Qualifier are entered.
If the specimen is cultivated enter the Accession Number and Cultivated Source. For cultivated specimens also check the Cultivated tick box.
- Accession Number – enter the full 8 digit Accession Number with the Qualifier if known. There should be no space or punctuation between them. Enter the RBGE accession number and qualifier (8 figure number starting with a year) followed by the qualifier of the individual plant from which this specimen has been made, if it comes from the living collections at E. There should be no space or punctuation between the accession number and qualifier. If the qualifier is not known then just enter the accession number alone. If it has a pre-1968 accession number please contact the Plant Records Officer
- Cultivated Source – enter the name of the donor of the cultivated material if known.
- Cultivated From – enter the wild collected Collection Object catalog number (not barcode) if known.
- Tip: The Catalog Number can be found at the very bottom of the Collection Object form.
How to enter information about the population size, abundance, area of occupancy, etc
The Collection Object Attribute part of the form is used to record information relating to Abundance, Sample size, Population and Area of Occupancy To add information to the Collection Object Attribute record click on the Add button next to the Collection Object Attribute header.
This expands the Collection Object Attribute part of the form
- Sample - select an option from the dropdown to describe the genetic variability of the specimen
- Abundance - select an option from the dropdown to describe the abundance of this taxon where it was collected
- Population Size - enter the number of individuals of this taxon found in this population
- Population Size Qualifier - select an option from the dropdown to qualify the estimate of the population size
- Area of Occupancy - enter the size of the area occupied by this population
- Area of Occupancy Qualifier - select an option from the dropdown specifying the unit for the area of occupancy
How to enter local names or usage information
The Collection Object Properties part of the form is used to record information relating to Uses and Local Name
To add information to the Collection Object Properties record click on the Add button next to the Collection Object Properties header.
This expands the Collection Object Properties part of the form
- Local name or usage – select whether the property is a local name or use.
- Text – for local names, enter any local (vernacular) names associated with this specimen if noted. For usage, enter a description of the use if known.
- Language - enter the language of the Local name or use if noted
Please note: if there is both a Use and a Local Name given enter one and then add an additional record to add the other.
How to attach documents to the Collection Object record
It is possible to attach documents and images to a Collection Object record.
Additional Record Data
- Catalogue Number - this is automatically added to the record when it is saved
- GUID - a unique identifier, generated by Specify. This field is read only
- Record Created By - name of the Agent who created the record. This field is read only
- Created Date - the date the record was created. This field is ready only
- Record Modified By - name of the Agent who modified the record. This field is read only
- Modified Date - the date the record was modified. This field is read only
How to create a new Preparation for an existing Collection Object
Search for the existing Collection Object using a Query. The Query Collection Objects by country or collector may be helpful.
If the Collection Object already exists, open the record and click Edit at the bottom right of the Collection Object form.
Click Add next to Preparations. This will open up a new Preparation in the Preparation subform.
Follow the Instructions for entering a new Preparation
Enter any specific Determinations relating to this Preparation if required.
If the remaining information is the same as for the other preparations in the Collection Object record, then click Save and close the record.
If there is any additional information that may be relevant for all preparations in the Collection Object record, then record these in the relevant field or in the Remarks field below Description (this field is currently being added).
Special situations
How to physically link specimens
Where a single sheet contains more than one specimen (i.e. multiple barcodes), then each specimen should be entered as a separate Collection Object and then linked using the Storage Location. Essentially, the specimen sheet itself is defined as a storage location which ‘stores’ one or more additional specimens.
By default, use the lowest barcode present on the sheet as the storage location, unless the filing information differs from the information in this specimen record.
If there is a chance that the barcode already exists as a Storage Location, search using a wild card (%) in front of the Barcode.
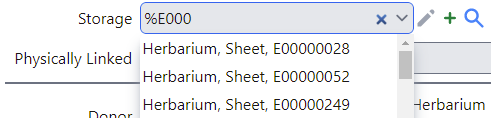
If there is not an existing storage location record, then create one by clicking on the + symbol to the right of the storage box. This will bring up the Storage subform in a pop-up window.
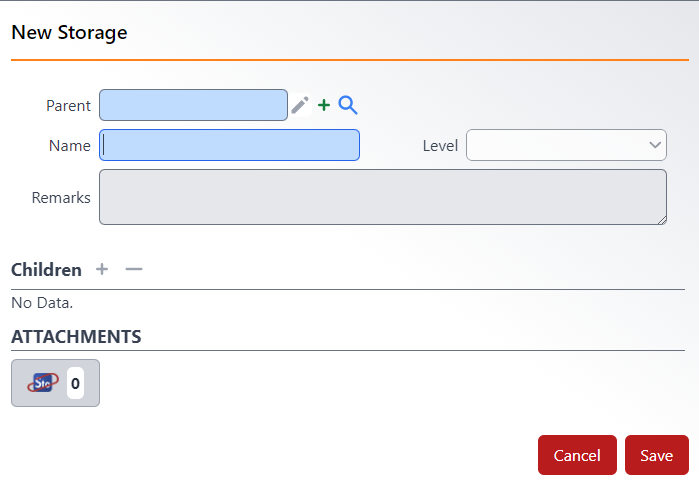
-
Parent - Enter the appropriate Parent Storage Location - in most cases this will be Sheet.
-
Level - enter the Level as Sheet.
Cultivated specimens
See Managing cultivated specimen data for an overview of the cultivated data structure in Specify.
Guidance is given below for each of the categories of cultivated specimens.
Cultivated specimen created from RBGE living collection with data in Iris
- Create a Collection Object record for the cultivated specimen only. The wild colleting information will be held in Iris.
- Follow the basic procedure for Collection Object data entry with the following:
- Enter the Accession Number and Qualifier in the Cultivated Information section
- Follow the basic procedure for Collection Object data entry with the following:
Cultivated specimen (not from RBGE) with previous collecting event information on the label
- Create a Collection Object record for the wild collecting event if there is not an existing specimen and if there is sufficient data (ie, who, when, where).
- Follow the basic procedure for Collection Object data entry with the following:
- In Prep type, select Data record, to indicate that there is no physical specimen in the Herbarium.
- Follow the basic procedure for Collection Object data entry with the following:
- Create a Collection Object record for the cultivated specimen.
- Follow the basic procedure for Collection Object data entry with the following:
- In the Cultivated Information section, enter the Catalogue number of the wild Collection Object in Cultivated from.
- Follow the basic procedure for Collection Object data entry with the following:
Cultivated specimen (not from RBGE) with limited or no previous collecting event information on label
- Create a Collection Object record for the cultivated specimen.
- Follow the basic procedure for Collection Object data entry with the following:
- Enter any previous collecting event information in the relevant field or in Collection Misc.
- Follow the basic procedure for Collection Object data entry with the following:
Cultivated specimen created from RBGE living collection with no data in Iris
- Create a Collection Object record for the cultivated specimen only. The wild colleting information should be going into Iris in the future. Please check with the Plant Records Officer if not sure.
- Follow the basic procedure for Collection Object data entry with the following:
- Enter the Accession Number and Qualifier in the Cultivated Information section
- Follow the basic procedure for Collection Object data entry with the following:
- If there is no Accession Number and Qualifier but still some wild collecting event data present, then a separate Collection Object record for this should be created in Specify and the catalogue number should be recorded in the cultivated Information section of the Cultivated record.
Level of data entry
Minimal data entry
Data included:
- Prep Type - select the kind of material (e.g. Herbarium specimen/sheet, Carpological).
- Barcode - scan the barcode of the specimen or enter the destructive sample item number. Both should be unique.
-
- Storage – enter the storage location of the specimen (e.g. Main Herbarium, Long Store, Spirit Room, Silica Room, Carpological Collection). For physically linked specimens (where there is more than one specimen permanently mounted on a sheet), the lowest barcode should be created as a storage location and used to store all the specimens on the sheet. See the Physically Linked section for more information.
- Physically linked - This is a read-only field used for data migrated from BG-BASE. If there is more than one specimen on the herbarium sheet or in the spirit jar (i.e. more than one barcode), this field will have the barcodes of the other specimens with a comma between each barcode.
- Taxon – enter the name of the taxon. Start typing the taxon name and a dropdown of all of the matching names will appear. This is refined as you keep typing.
- Name Usage – enter the usage of the name being associated with the specimen (e.g. Label name, Curatorial annotation, Data Capture name, Det., Fide, Typification). Guidance for each option is given below:
- Data Capture Name: A data capture name is used primarily for minimal data capture where the name entered is the name on the folder where the specimen is filed.
- Family No. – this is a calcuated field for the RBGE family filing number.
- Genus No. – this is a calculated field for the RBGE genus filing number.
- Filing Region – enter the region under which the specimen is filed. If the specimen is filed under a physically linked specimen mounted from a different region, then select the region under which it would be filed if separate. If the specimen is Cultivated, then select the ‘Cultivated’ option from the drop-down list, unless it is filed under the geographical filing region (there are a small number of families where cultivated specimens are being filed under the wild collected region). Tip: Unless it is known that the specimen is filed different, select the standard geographical filing region.
- Catalogue Number - this is automatically added to the record when it is saved
- GUID - a unique identifier, generated by Specify. This field is read only
- Record Created By - name of the Agent who created the record. This field is read only
- Created Date - the date the record was created. This field is ready only
- Record Modified By - name of the Agent who modified the record. This field is read only
- Modified Date - the date the record was modified. This field is read only
Partial data entry
As for Minimal data entry + additional fields to be determined
Full data entry
All label data on specimen, including det slips and other annotations.